Introduction
For those that don't know Kanboard is an open source kanban project management web app.
It's a very useful app for teams trying to organize different projects, but it can take quite some technical expertise to use correctly.
Even though this post goes over my journey for writing a plugin, I have written it so that it can be useful to anyone who is new to writing plugins for Kanboard, skip to guide
At my workplace, we have very little program/project management. In my efforts to improve this management--and communication between teams--a coworker and I decided to claim a Dell OptiPlex 7470 AIO that was left unused in our staging room and turn it into a public status board for our different projects.

We cycled through different self-hostable kanban solutions before landing on Kanboard because it allowed some features that we really needed, mostly the public board view.
The Problem
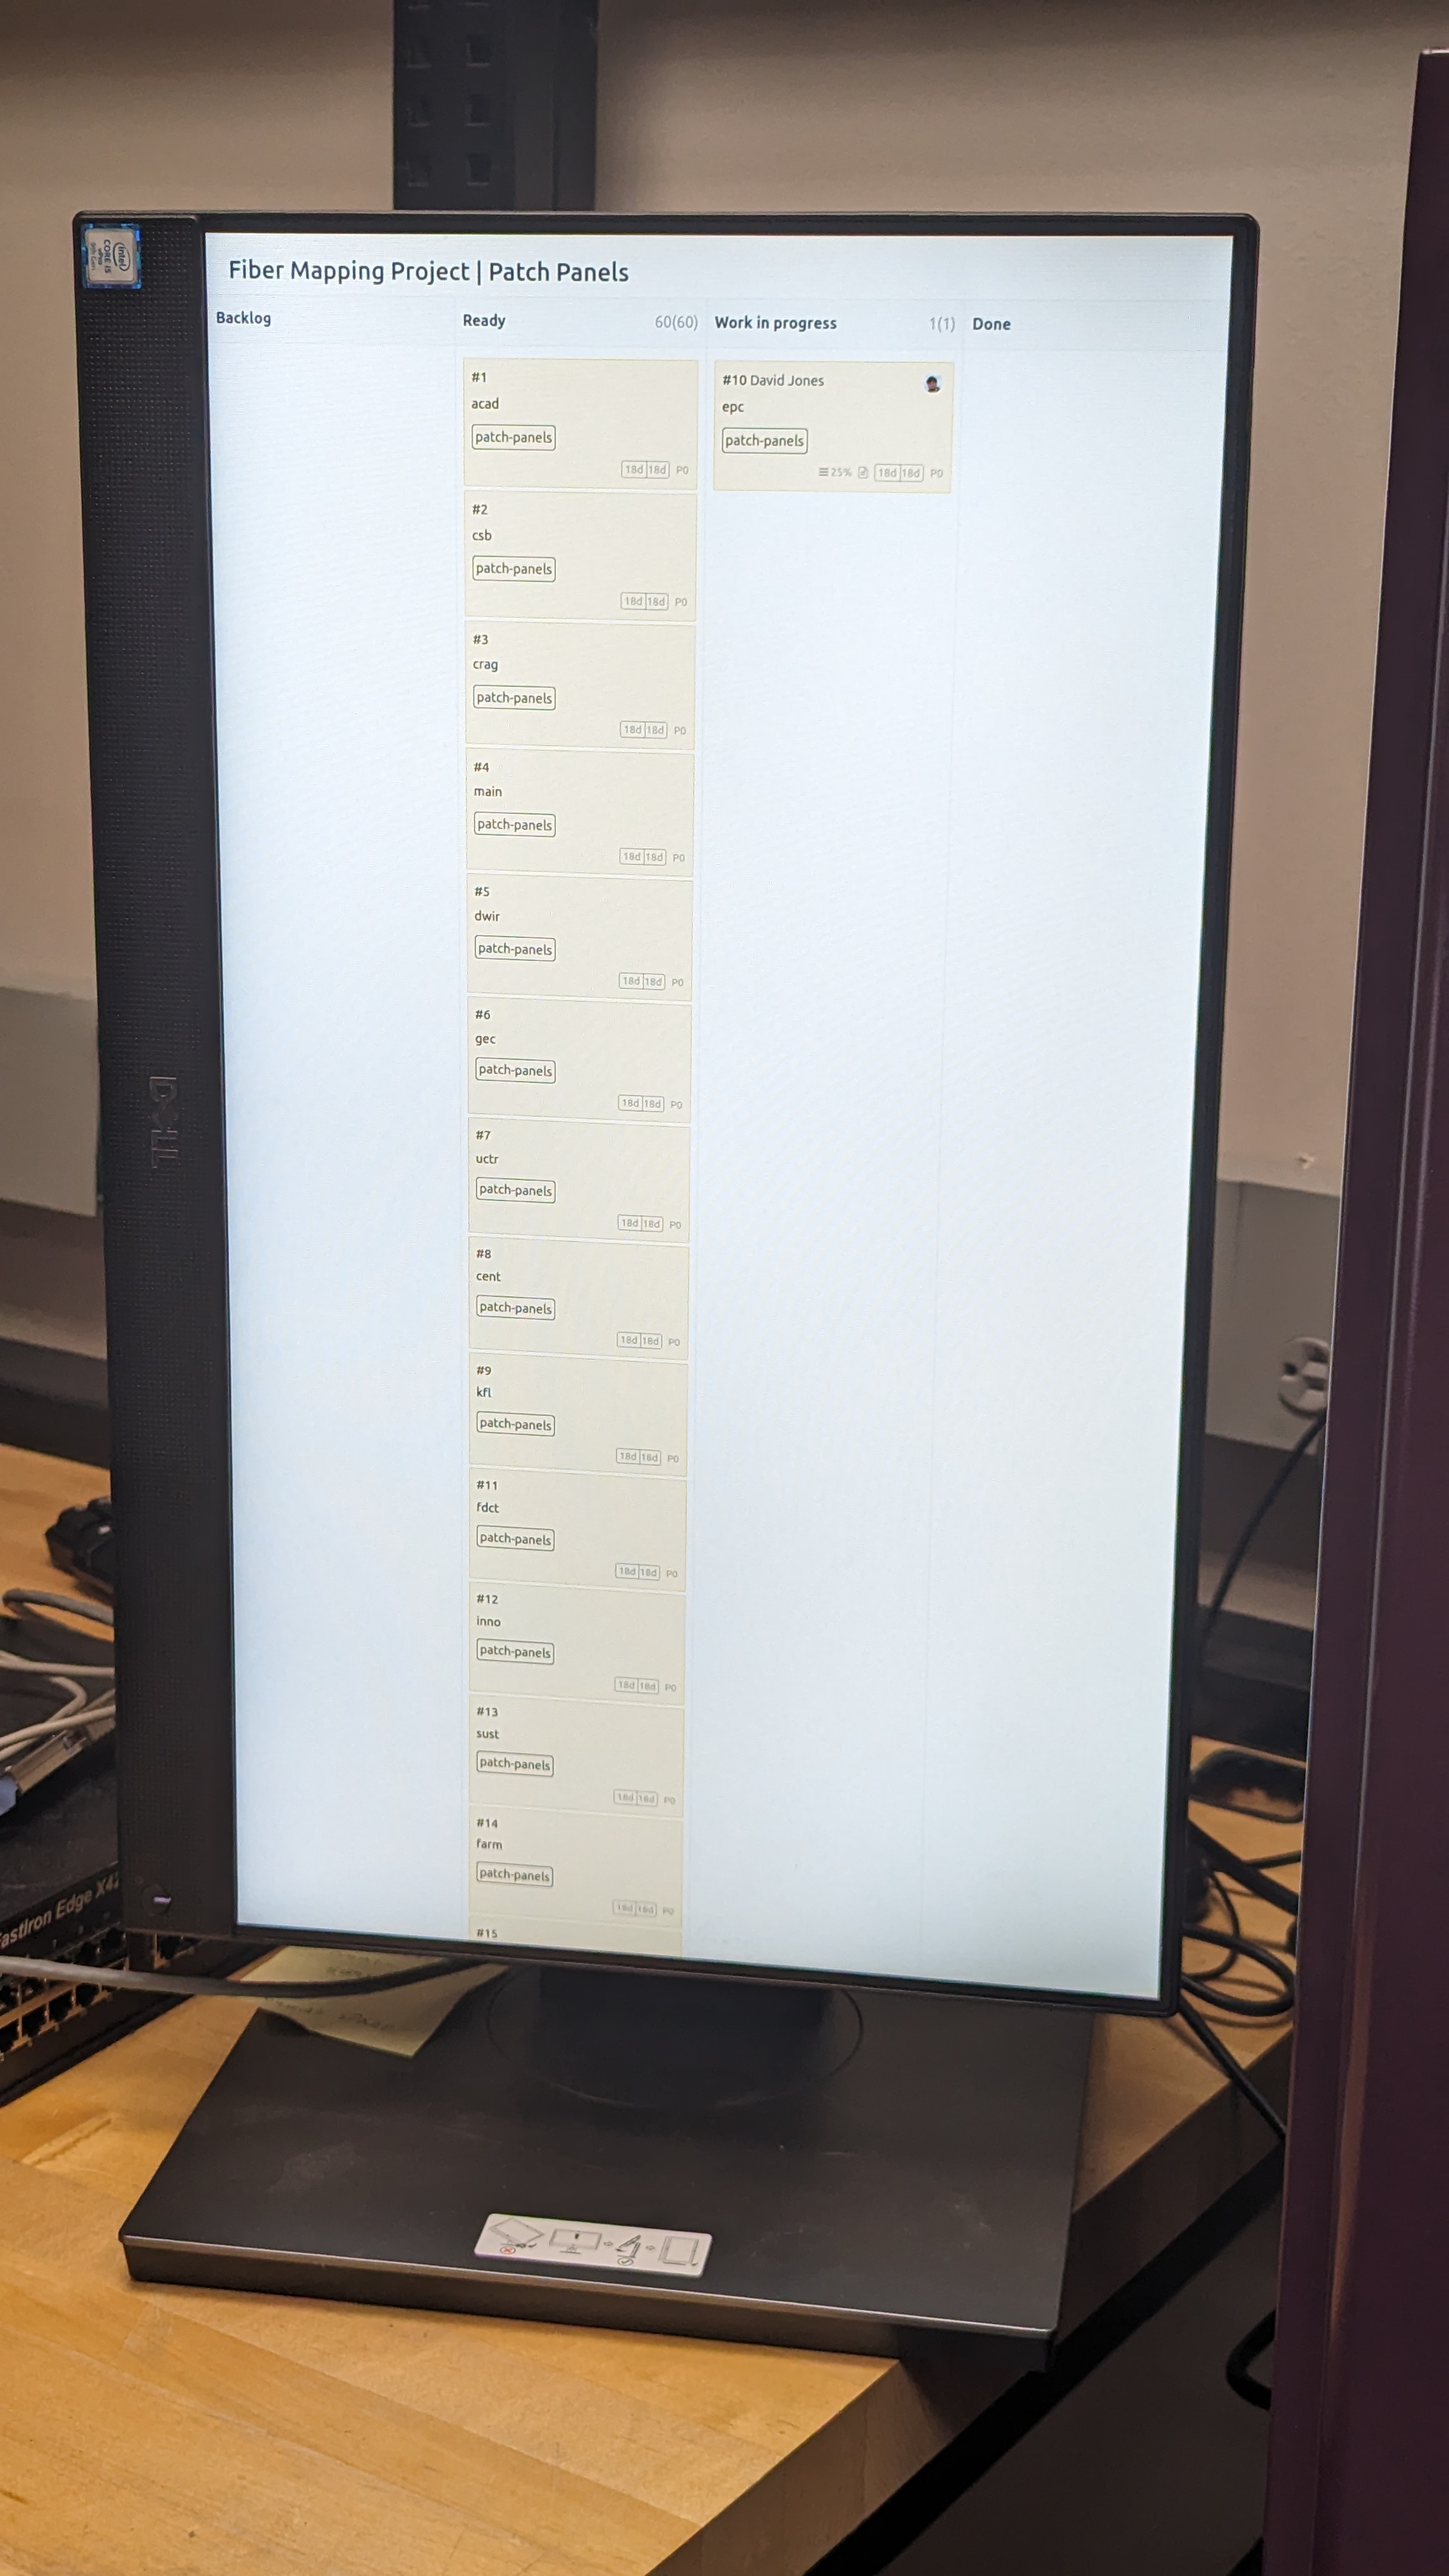
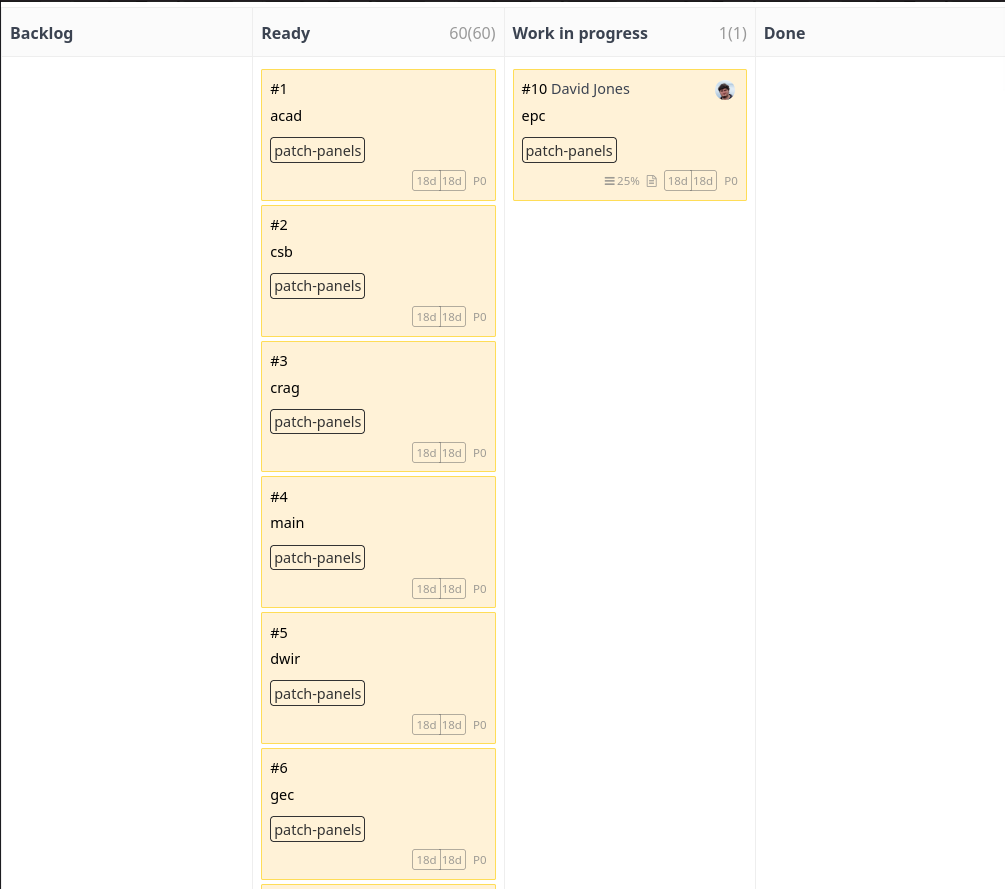
After setting up the server using the Docker Compose instructions and adding our projects we noticed a problem. The public board view does not show the title of the board!

This is a problem, we intended for the boards to be displayed in fullscreen Firefox, meaning that all anyone could see is what you see in the screenshot above.
Fortunately, I am familiar with changing the DOM to do what I want, I thought about writing some JavaScript that would put the project title there, but then I realized that Kanboard supports plugins.
So I started searching for a plugin that would do what I needed, but nobody made a plugin that does what I need. So I decided to write my own plugin, but I had no idea where to start.
Developing the Plugin
There aren't really any guides online for how to develop Kanboard plugins. Sure there is [some documentation](https://docs.kanboard.org/v1/plugins/) but it doesn't really make it easy to know *where to start*. I did try to use ChatGPT for help getting started, but ultimately it has no idea what it's doing, so I had to abandon that idea.Making the plugin
Luckily, I found the cookiecutter for Kanboard plugins. This creates a skeleton of a plugin, most importantly it makes the Plugin.php file. This is the most important file as this is what Kanboard looks for when installing plugins.
Here is what Plugin.php should look like, with comments explaining different sections:
<?php

// This defines the internal name of the plugin,
// The last part of the path must match the plugin folder name
namespace Kanboard\Plugin\PluginName;

use Kanboard\Core\Plugin\Base;
use Kanboard\Core\Translator;

class Plugin extends Base
{
    public function initialize()
    {
        // This is where all of the logic of the plugin will go
    }

	// Not strictly necessary, but created by the cookiecutter
    public function onStartup()
    {
        Translator::load($this->languageModel->getCurrentLanguage(), __DIR__.'/Locale');
    }

	// Kanboard Plugins need to expose information about themselves,
	// this is what these functions are for

	// This tells Kanboard what the name of the plugin is
    public function getPluginName()
    {
        return 'Plugin Name';
    }

	// This is a bit of text displayed alongside the plugin name
    public function getPluginDescription()
    {
        return t('Plugin Description');
    }

	// This is the plugin's author
    public function getPluginAuthor()
    {
        return 'Author';
    }

	// This tells Kanboard what version your plugin is
    public function getPluginVersion()
    {
        return '1.0.0';
    }

	// And this can contain any URL and is clickable in the plugin menu
    public function getPluginHomepage()
    {
        return 'https://your.plugin.homepage';
    }
}
Technically, having this file in a folder name PluginName would be a valid plugin loaded by Kanboard. But this doesn't actually do anything, so lets fix that.
Modifying the DOM in Kanboard
The simplest type of plugin you can make modifies the appearance or layout of an existing page.
There are two main ways to make changes to the Kanboard templates: hooks and overrides. Hooks are very useful, but there is a limited number of them and they can't be used to make changes in locations where there is no hook. In general, overrides are more extensible and allow more thorough and detailed changes to the page.
Overrides replace a template file from the base Kanboard app with one of your own. This does mean that only one plugin can override the same template, if two plugins try, only one will be rendered.
Here is an example from Plugin.php in the plugin I developed:
	// Start of Plugin.php...
	public function initialize()
    {
        $this->template->setTemplateOverride('board/view_public', 'PublicHeader:header');
    }
    // Rest of Plugin.php...
Using an override is simple, but it requires checking against the Kanboard template source. The first argument points to the php template file relative to the base Kanboard Template/ directory. In the case of my plugin, I am overriding Template/board/view_public.php. We remove the Template/ part of the path, and the .php file extension from the end.
The second argument tells Kanboard what is replacing board/view_public, we need to provide the namespace of the template file, in this case it is PublicHeader:. After the colon, we need to give it the path to the new template file, in this case the path from my plugin root is Template/header.php. Because this function only acts on templates, we also remove the Template/ part of the path, as well as the .php file extension.
Writing Templates
Templates are .php files containing a mix of HTML and PHP. When you write templates for your plugin they must be placed inside the PluginName/Template directory tree in order for the plugin to find them.
In the case of overrides, you are completely replacing the original content of the template, if you wish to keep this content, you need to include it in your file. Fortunately Kanboard is open source, so all the base templates are available to read and copy.
In the case of my plugin I am overriding Template/board/view_public.php. My plan is to add a title to the top of the page, In the end my Template/header.php will look like this:
<div class="public-board-title" style="margin-left: 1.5rem;">
    <h2><?= $project['name'] ?></h2>
</div>

<section id="main" class="public-board">

   <?= $this->render('board/table_container', array(
            'project' => $project,
            'swimlanes' => $swimlanes,
            'board_private_refresh_interval' => $board_private_refresh_interval,
            'board_highlight_period' => $board_highlight_period,
            'not_editable' => true,
    )) ?>

</section>
Here we can see the div containing my title element, and below that is the full content of the base template I am overriding.
Determining Template Context
As you can see in my header.php file, I am accessing the variable $project['name']. Unfortunately, there isn't a reference online for the different variables available. I knew that $project was an option because it is used in the base template. You may need to check the Kanboard source code in order to find what variables you have access to inside your template.
Figuring out values inside variables
Finally for my plugin, I needed to figure out how to access the project name, it may seem obvious to access the 'name' element inside the $project variable, but that's only because you are able to see the solution in front of you. When I was writing this template I had no idea what the data type of $project was at first.
I quickly learned that $project is an array, but because I am new to PHP, I did not know that arrays can behave like arrays or dictionaries depending on how they are created. In this case the easiest way to see what the array contains and how to access them is to dump the full contents of the array as a string into the spot where the title would have gone. This helped me figure out what the structure of $project was and how to access specifically the projects name.
Conclusion
I think that writing a very simple plugin is the best way to learn how to write plugins. If you need to write a plugin more complex than just template changes, it is a good idea to read the documentation to see if you can learn the components you need to write your plugin.
You can also ask questions on the Kanboard forum to get expertise from those with far more knowledge of Kanboard's inner workings and plugin development.